by Bill Cooke
As time has moved along, I have gotten better at building rockets – at least in the sense of finishing and making them look good. I have gone from the classic 10 foot rocket (“rocket looks good from 10 feet away”) to 3 foot rockets, and even the occasional one foot rocket. It is a learning process, accomplished mainly through trail and error and reading the online forums (Ye Olde Rocket Forum) and blogs (Model Rocket Building by Chris Michielssen). However, the joy in turning a cardboard tube and some balsa into a flying, eye-catching rocket is a major high for me, and I’m sure you’ll like it too!

Before I start discussing tools, there are a couple of things you absolutely need to turn out a decent model:
- Think about the build – Even when building a kit, you need to think about how you will get to the end product. Does the body tube have spiral seams that need filling? Does it have tube fins, pods, or hard-to-get-at surfaces that may require finishing and painting before they are attached? Do you wish to replace the shock cord mount with another like the “Quest type” to free up more space for the parachute or streamer? The answers to these and other questions will determine how you proceed with the build, so it is good to resolve them up front before you are faced with a gotcha.
- Have patience – Nothing good ever comes from rushing a model build; in fact, my biggest mistakes have come when trying to hurry a model for a launch or trying to get it finished and painted before a rain front moves in. Allow plenty of time, especially for finishing and painting, which takes far longer than the building for most LPR birds. The sun will return and there is always another launch, so don’t pressure yourself.
Building a rocket requires the right tools. Here are the ones I use, in no particular order:
- Glue – Aileen’s Original Tacky Glue is what I use to attach fins; it sets up quickly and provides a strong bond. I use wood glue (Titebond) for fin fillets or wood-to-wood joints.
- Knife – X Acto #1 knife with #11 fine point blades – is there anything else? Blades are cheap, so ensure yours is sharp by replacing it fairly frequently (How often depends on use and materials you cut).
- Sandpaper – Various grits, all the way from 150 to 2000. I use 150 to shape plywood and dowels, 220-240 to shape basswood and balsa, 320 to smooth fins and body tubes, and 400 for smoothing the finish (sanding paint base coats). 1000/2000 grit is good for removing paint spots and tiny imperfections – you can get these from hobby shops like RC Hobbies here in town or order it online. You will not find anything finer than 400 grit at Home Depot. Have plenty of sandpaper, because you will be doing a LOT of sanding!
- Sanding blocks – You CAN sand fins and finishes with just sandpaper in your hand, but a sanding block (small wooden block or t-shaped piece of aluminum) gives you a lot more control, especially when you are trying to put angled edges on that scale model or smooth fin surfaces (fingernails can scratch balsa easily). These are also cheap and available online and at hobby/craft stores; you can make wood ones yourself from scrap plywood if you are so inclined.
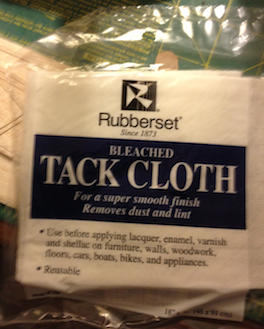
- Tack cloths – Once you have done the actual building, you will need to keep the rocket clean while you add primer and paint, as there is some sanding in between coats. Paper towels and soft rags help to some extent, but I have found that they always leave small particles and junk that cause unsightly bumps in the paint. A tack cloth is a sticky piece of cheese cloth that will actually grab the dust and gunk as you wipe the rocket down (see pic at bottom). Available online or at Hobby Lobby or Michaels for a couple of bucks each, they are indispensable for getting a good finish!
- Rulers – Absolutely, positively essential! I have a couple of plastic ones that I use to make measurements, and a thin metal ruler I use as a knife guide to cut fins, patterns, and decals/markings. Only way I am able to cut a straight line!
These are the basics – I have left out very obvious things like pencils and sharpies used to mark alignment lines, etc. However, a good build requires more than just the basics, especially in marking alignment lines, cutting body tubes, and filling seams and other imperfections. I’ll cover those in part 2…


